Learning how to shoot outdoor family photography with confidence comes down to one thing: having a decision-making sequence you trust. Not hoping the location is beautiful. Not scrambling for settings when the light changes. A framework that tells you what to think about first — and in what order.
I call it the 5 L Method. Five decisions, made in a specific order, every single session. Once you understand the sequence, outdoor photography stops feeling reactive and starts feeling like something you can actually lead.
The short answer: The 5 L Method is a decision-making sequence for outdoor family photography. Light, Look, Location, Lens, Landscape, in that order, for every session. Each decision informs the one that follows. Start with light. Everything else builds from there.
Why Order Matters in Outdoor Family Photography
The reason the 5 Ls work is not because they are magic. It is because they reflect how the decisions actually depend on each other. Light shapes location. Location influences lens choice. Lens choice changes how you use the landscape. You cannot make good decisions out of sequence.
L #1: Light
Light is always first. Before anything else, read the light.
Where is the sun right now? How high is it? What direction is it coming from? Is it filtered by cloud or haze, or is it hitting everything hard and direct? Based on all of that, what kind of lighting situation do you need to put your family in?
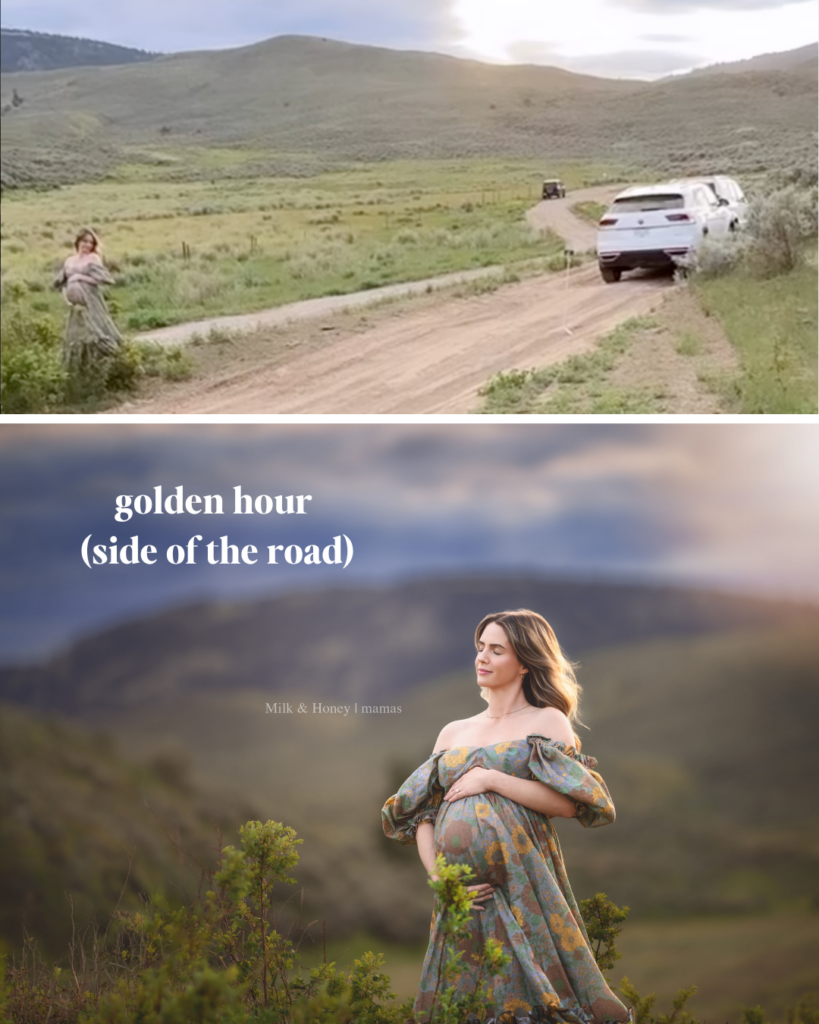
Are you looking for open shade? Can you use the light for backlighting or side lighting? Is it an overcast day where you have total flexibility? Is it golden hour and you need to move fast?
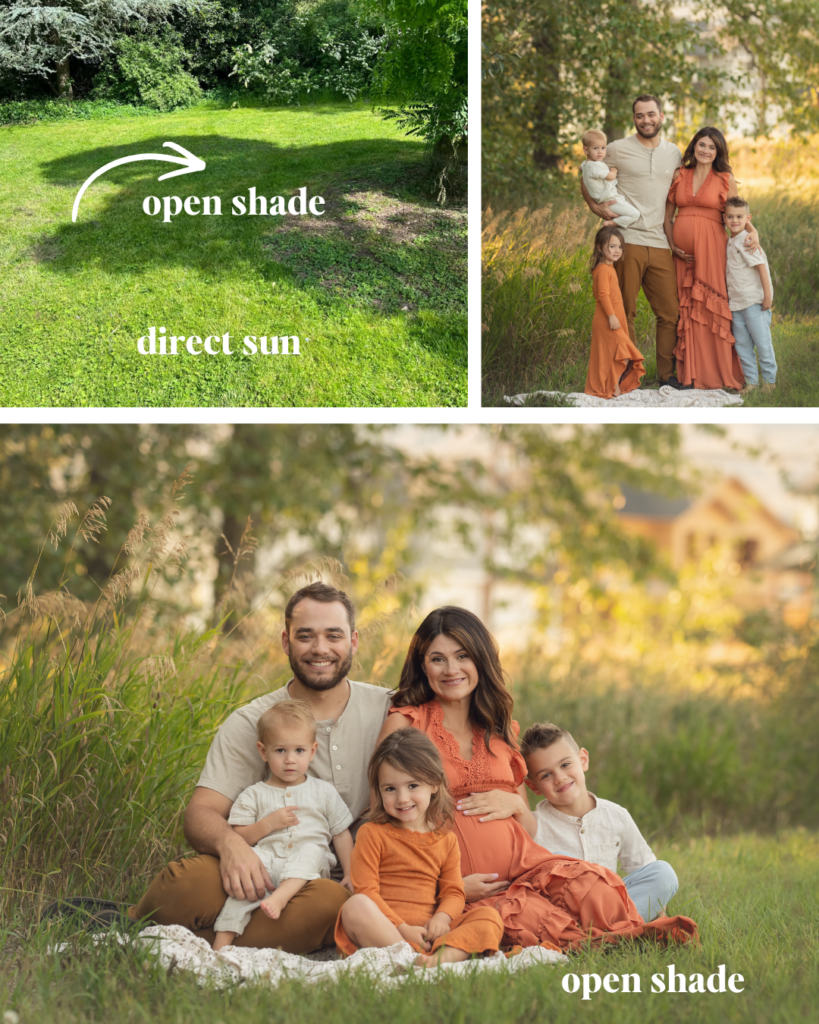
You read the light before you do anything else because the light determines everything that comes after it. If you pick a location before you understand the light, you are just guessing.
L #2: Look
Look is the vision. What is this session supposed to feel like?
Is it a soft, minimal, painterly maternity session? Is it a nostalgic and warm family session with that lived-in feeling? Is it bold and editorial, or quiet and intimate?
The look shapes every styling decision. What you have guided the client toward wearing, what colors will work with the environment, what mood you are building. You are not just showing up and shooting. You have a vision before you arrive. The look is that vision.
It sounds like a creative detail. But it actually drives practical decisions — wardrobe, color palette, how you want the final images to feel. Getting clear on it before you think about location saves you from mismatches that are hard to fix later.
L #3: Location
Once you know the light and the look, then you think about location.
And here is something that gets overlooked. The very first thing I think about with location is not whether it is beautiful. It is whether the family can actually get there comfortably.
Is there a toddler who will refuse to walk? Is this a maternity client or a mother recovering from a C-section? Is there a grandparent coming who needs even ground? A stunning location that requires a ten-minute hike might be perfect for one family and completely wrong for another.
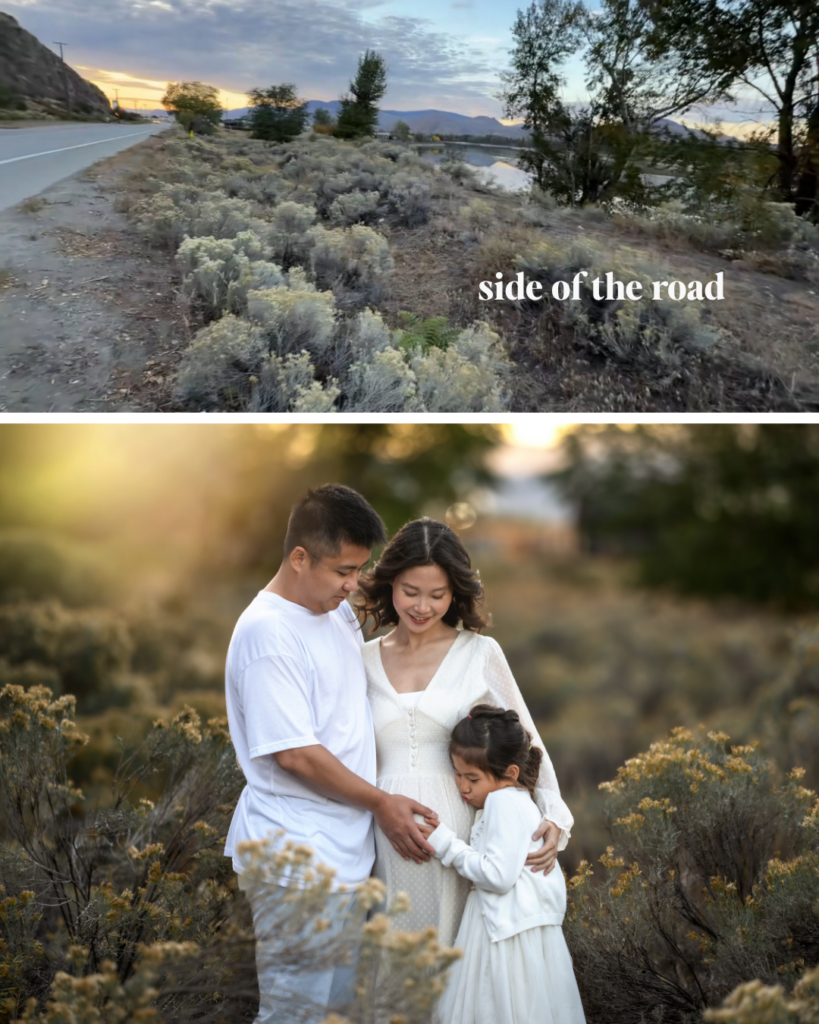
Then comes the light question: will this location work with the light you just assessed? What direction are you facing? What is behind them? What is creating the shade or diffusion you need?
Location serves the light and the family. Not the other way around.
L #4: Lens
Based on your look and your location, now you choose your lens.
How much of the environment do you want in the frame? Do you want the background to disappear into a soft blur behind your subjects, or do you want the trees, the mountains, the sky to be part of the story?
A 200mm and the world behind them disappears. A 50mm and the landscape becomes part of the image. Neither is wrong. The choice depends on the look you decided on in step two and the location you are working with in step three.
Lens choice is a creative decision. It is not a technical default you fall back on. And it happens before you think about aperture, before shutter speed, before any of the camera settings. The lens shapes how the image looks more than anything else.
L #5: Landscape
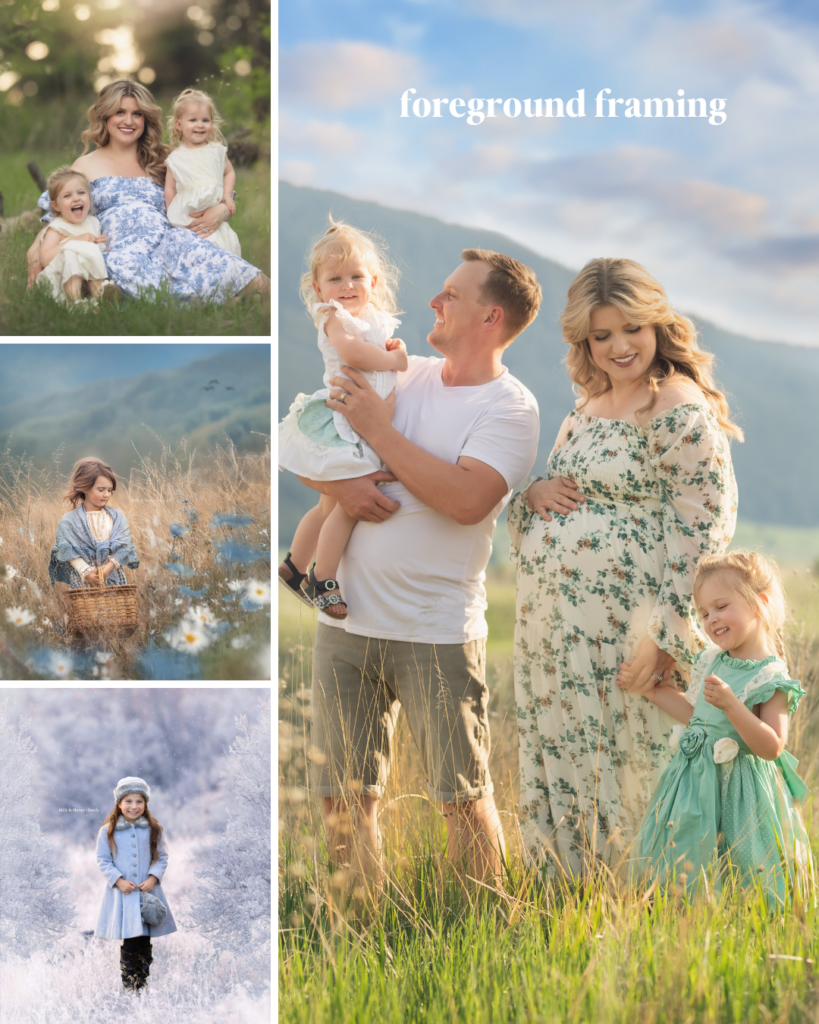
Last is landscape — and this one is about more than backdrop.
How can you use the environment itself to make the portrait stronger? Are there trees you can shoot through? Branches overhead that frame the family. A gap in the brush that creates a natural opening.
Are there foreground elements — grass, rocks, brush — that visually ground your subjects in the scene? Foreground matters more than most beginners realize. Without it, subjects can look like they are floating. A bit of foreground places them in the world.
The landscape is not just a backdrop. It is a tool. Once you start seeing it that way, even ordinary locations have something to offer.
Using the 5 L Method When You Feel Lost in a Session
This framework is not a checklist you consciously work through anymore once it is in your bones. It just becomes how you think. But in the early days, and on sessions where things feel off, it is a reset point.
If you are feeling lost mid-session, ask yourself which L you have not figured out yet. That is almost always where the answer is. Did you pick a location before you read the light? Did you forget to think about the landscape once you found a spot? Did you default to your one lens instead of choosing intentionally?
Five decisions. Made in order. Every time.
Related: Getting Started with Family Photography
Frequently Asked Questions
Do I need to go through all 5 Ls every single session?
Eventually it becomes automatic, and you will move through them quickly without thinking about it as a checklist. In the beginning, though, yes — going through each one deliberately helps you build the habit of intentional decision-making instead of reactive shooting.
What if I cannot find open shade or good light at the location?
That is actually why light comes first. If you read the light before committing to a location, you can adjust your choice based on what the light is doing. You can also use backlighting, side lighting, or even shoot into full sun with some adjustments. Good light management starts with understanding what you are working with, not hoping the location fixes it.
Should I choose my lens before I get to the location?
You can have a general idea, but final lens choice works best once you can see the location and the light together. Sometimes you arrive, and the background is busier than expected, which means you want more compression. Staying flexible until you are on-site tends to produce better results.
What counts as using the landscape?
Anything in the environment that makes the image stronger. Foreground grass or brush that grounds the subjects. Trees or branches that frame the scene. A line or opening in the environment that draws the eye. You are looking at the scene as a tool, not just a backdrop.
The Bigger Shift
The 5 L Method is less about five specific things and more about the habit of being intentional before you ever raise your camera. Outdoor photography is unpredictable. But it is not random. There are patterns you can learn to read, decisions you can practice making in a reliable sequence.
That is when it stops being stressful. Not when the conditions are perfect. When you have a framework for working with whatever conditions you have.
If you want to go deeper on each of the five decisions, I teach all of it inside Enlighten, my natural light photography course. But for now, just start with the first L. Read the light when you arrive. Everything else builds from there.

 TMW - The Storyteller's Toolkit")